Welcome to your comprehensive guide on unlocking the true potential of Rational Application Developer (RAD). Whether you are a seasoned developer or just starting, this guide will equip you with the knowledge and tools to maximize your productivity and efficiency using RAD. The primary focus is on practical, actionable advice designed to solve real-world problems and enhance your development workflow. We will walk through fundamental concepts, advanced strategies, and offer best practices tailored to your needs.
Understanding the Core Problem: Streamlining Your Development Process
Many developers face the challenge of managing complex, large-scale applications without the right tools to streamline their processes. This can lead to inefficiencies, increased error rates, and longer development cycles. Rational Application Developer offers a comprehensive suite of tools designed to tackle these issues head-on. By leveraging RAD’s integrated development environment (IDE), you can reduce the time spent on context switching, improve code quality, and enhance collaboration among team members.
However, getting started with RAD can be overwhelming due to its vast array of features. This guide aims to simplify that journey by providing clear, step-by-step instructions, practical examples, and problem-solving strategies to help you maximize the tool's capabilities.
Quick Reference
Quick Reference
- Immediate action item with clear benefit: Start with a small, manageable project to familiarize yourself with RAD’s interface and core functionalities.
- Essential tip with step-by-step guidance: Use the built-in code refactoring tools to improve code readability and reduce bugs. This can be done via “Refactor” > “Rename” or other relevant options.
- Common mistake to avoid with solution: Avoid creating large, monolithic projects right away. Instead, break your projects into manageable modules to leverage RAD’s modular build tools more effectively.
Setting Up Rational Application Developer: Step-by-Step
Getting started with Rational Application Developer involves several steps. This section will guide you through the setup process, highlighting essential components and best practices to get you off to a strong start.
The first step is to download and install the Rational Application Developer IDE.
- Downloading RAD: Visit the IBM website to download the latest version of Rational Application Developer.
- Installing RAD: Run the downloaded installer and follow the on-screen instructions. Ensure you select all necessary components for your project types (e.g., Web, Java, etc.).
- Initial Configuration: Once installed, launch the IDE. The first time you start RAD, it will guide you through an initial configuration where you can select the perspectives and preferences that best suit your workflow.
Next, we will explore how to configure your development environment for optimal use.
Configuring Your Development Environment
Configuring your development environment is critical to ensuring smooth and efficient workflows. Here’s how you can set it up to maximize productivity with RAD:
- Setting Up Your Workspace: Customize your workspace layout by adding the most frequently used views and perspectives. To do this, go to “Window” > “Perspective” > “Open Perspective” > “Others” and select your preferred layouts.
- Installing Necessary Plugins: To extend RAD’s functionality, you can install additional plugins and extensions. Navigate to “Help” > “Eclipse Marketplace” to find and install plugins that support your specific development needs.
- Setting Up Project Templates: Create and configure project templates to standardize your project setup process. This can be done by going to “File” > “New” > “Project” and then customizing your templates accordingly.
Once your environment is configured, you’ll need to understand the basic functionalities of RAD to start developing effectively.
Navigating RAD’s Interface: Essential Tools and Features
Understanding RAD’s interface is crucial for leveraging its full potential. Here, we’ll cover the essential tools and features you need to navigate efficiently:
- The Package Explorer: This is your primary tool for navigating and managing your projects and files. It’s akin to a file explorer within your IDE, where you can view, add, and manage your project resources.
- The Console View: Use this view for running and debugging applications. It displays the output of your applications and any error messages that occur during execution.
- The Team Synchronization View: If you’re working in a team, this view is essential for managing version control. It helps you synchronize changes across team members and manage version history.
Coding and Developing with RAD: Best Practices
Efficient coding and development are pivotal for leveraging RAD’s capabilities. Here’s how you can enhance your coding practices:
- Leveraging Code Assistance Features: RAD provides numerous code assistance features, such as code completion, inline documentation, and context-sensitive help. Use these features to write cleaner, more efficient code.
- Implementing Refactoring Tools: Regularly use RAD’s refactoring tools to improve your code structure. Refactoring helps maintain clean code, reduces bugs, and enhances readability. Some common refactoring options include “Extract Method,” “Move/Copy,” and “Rename.”
- Writing Unit Tests: To ensure your code is robust, write comprehensive unit tests. RAD supports various testing frameworks. Integrate unit tests into your development workflow to catch issues early.
Debugging and Troubleshooting in RAD
Effective debugging and troubleshooting are key components of a successful development process. Here’s how you can make the most of RAD’s debugging tools:
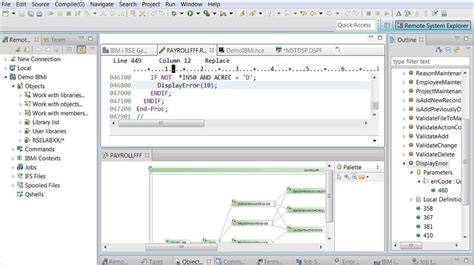
- Setting Up Breakpoints: Breakpoints allow you to pause code execution at specific points, helping you inspect variable values and program flow. Set breakpoints by right-clicking on a line of code and selecting “Set Breakpoint.”
- Using the Debugger: RAD’s debugger provides interactive tools for stepping through code, inspecting variables, and evaluating expressions. Use the debugger to pinpoint and fix issues efficiently.
- Common Debugging Mistakes: Avoid skipping over error messages or ignoring warnings. Always address every error and warning to prevent potential issues later in the development cycle.
Let’s delve into more detailed topics to enhance your expertise with Rational Application Developer.
Advanced Development Techniques with RAD
For experienced developers looking to push the boundaries of what they can achieve with RAD, these advanced techniques can help unlock new levels of efficiency and productivity:
- Integrating Continuous Integration Tools: To automate testing and deployment, integrate continuous integration tools like Jenkins or Travis CI with RAD. This ensures your code is tested automatically every time you make changes.
- Using Macros and Automation: RAD supports macros that allow you to automate repetitive tasks. Create macros for common tasks, such as building projects or generating reports, to save time and reduce errors.
- Leveraging Custom Plugins: To extend RAD’s capabilities, develop or use existing custom plugins tailored to your specific development needs. These plugins can provide additional functionality and improve workflow efficiency.
Practical FAQ
How do I integrate Rational Application Developer with my existing version control system?
Integrating RAD with a version control system (VCS) like Git, SVN, or Mercurial is straightforward. Here are the steps:
- Installing the Plugin: First, install the necessary plugin for your VCS from the Eclipse Marketplace. Navigate to “Help” > “Eclipse Marketplace” and search for your VCS plugin (e.g., “Egit” for Git).
- Configuring the Plugin: Once installed, configure the plugin by going to “Window” > “Preferences.” Here, you can set up your repository paths, credentials, and other settings specific to your VCS.
- Using the Integration: To start using the integration, right-click on your project in the Package Explorer, and select the relevant VCS options. For