Welcome to the Ultimate Guide on Developing Film at Home
Are you ready to embark on a rewarding journey that blends creativity with practicality? Developing film at home can be an immensely satisfying experience that allows you to bring your photos to life exactly the way you envision them. This guide is designed to help you navigate the intricate process of film development with clear, actionable advice that will transform you from a novice into an expert in no time.
By the end of this guide, you’ll understand every step, from preparing your workspace to safely and effectively processing your film, all while avoiding common pitfalls. Whether you’re an enthusiast who loves the tactile and chemical process or someone looking for a new creative hobby, this guide is for you.
Understanding Your Needs: Why Develop Film at Home?
First and foremost, let’s address why developing film at home is such a compelling endeavor. Traditional photo labs not only require a trip and time but also come with variable costs and sometimes an unsatisfying level of control over the final images. By developing film at home, you gain:
- Complete control over the entire process, from development to printing
- The ability to experiment with different chemicals and techniques to discover your unique style
- A deeper understanding and appreciation of the intricacies of film photography
- Personal satisfaction from producing photos exactly as you imagined them
Quick Reference Guide
Quick Reference
- Immediate action item with clear benefit: Sanitize your workspace to avoid any contamination.
- Essential tip with step-by-step guidance: Wash your hands thoroughly before handling film.
- Common mistake to avoid with solution: Never reuse chemicals; they lose effectiveness over time.
Getting Started: Preparing Your Workspace
To get started, it’s essential to have a dedicated, clean workspace where you can conduct your film development. Here’s how you can set up:
1. Choose a Clean Space: Find a dedicated area in your home with minimal foot traffic. A small basement, garage, or even a corner of your bathroom can work well.
2. Sanitize Everything: Thoroughly clean and sanitize all equipment that will come into contact with your film. Chemicals can react differently if contaminated.
3. Prepare Your Chemicals: Ensure you have the necessary chemicals, including developer, fixer, and wash solution. Follow the instructions carefully on the packaging.
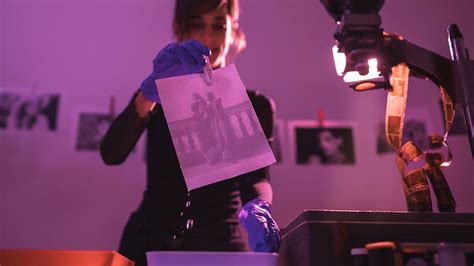
Detailed Steps for Developing 35mm Film
Now, let’s break down the detailed process of developing 35mm film. This section is structured to guide you through every phase, from loading the film to the final steps.
Step 1: Preparing Your Chemicals
Before beginning, make sure your chemicals are at the correct temperature. Most developers are recommended at about 68°F (20°C). Prepare your tank with the developer, and let it sit for a few minutes to reach the desired temperature.
Here’s a step-by-step guide for preparing your chemicals:
- Mix your developer following the instructions on the bottle. Generally, it involves diluting the powder with water.
- Use a thermometer to check that your solution has reached the proper temperature.
- Pour the developer into your tank, ensuring it is well-agitated to avoid air bubbles.
Step 2: Loading the Film
Loading the film into your tank is a delicate process. To avoid damaging the film, follow these steps:
- Turn off the lights in your workspace to better see the film.
- Place the tank on a stable surface and slowly open the lid.
- Use forceps or your bare hands to pick up the film canister. Insert it carefully into the tank without touching the film inside.
- Submerge the canister completely in the developer solution.
Step 3: Developing the Film
Now, let the film develop in the solution:
- Set a timer for the recommended time on the developer’s instructions (usually around 9 minutes).
- Stir the tank gently at the start and then let it sit undisturbed.
- Keep an eye on the time, but avoid looking inside the tank as the changing colors can trick your eyes.
Step 4: Stopping Development
Once your film has fully developed, it’s essential to stop the process:
- Rinse the tank with cool, running water to remove any residual developer.
- Transfer the film to the fixer solution immediately.
- Follow the fixer’s instructions, usually around 5-7 minutes, to stop the development process.
Step 5: Washing the Film
The final rinse ensures no chemicals are left on the film:
- Rinse the film under cold water for several minutes.
- Continue washing until the water runs clear.
- Hang the film to dry in a dark, dust-free area. It’s best to use a film hanger.
FAQs on Developing Film at Home
What should I do if my film comes out blank?
A blank film could indicate one of several issues:
- Your developer was too cold or under-diluted.
- You didn’t agitate the tank enough during development.
- Your film was exposed to light during the process.
Check each step carefully and ensure that the temperature of your chemicals is correct. Avoid any light exposure, even from ambient light, and make sure your tank is agitated consistently during development.
Tips and Best Practices
Developing film at home involves several nuances that can significantly affect your results. Here are some additional tips and best practices:
- Experiment with different developers and techniques to find what works best for you. Different brands of film may require slight adjustments.
- Record your process, noting times, temperatures, and any changes you made. This can help you replicate successes or understand what went wrong.
- Avoid touching the film with bare hands. Use forceps or cotton gloves to handle your film, especially when it’s freshly developed.
- Use fresh chemicals. Reusing chemicals can lead to unpredictable results. Always use fresh solutions.
- Store film properly. Keep your unused film in a cool, dark place in its original canister to prevent premature exposure.
By following this guide, you’re well on your way to mastering the art of film development at home. Enjoy the process, and happy shooting!