Unlocking the Best Invisible Braces in New York: A User-Focused Guide
Choosing the right invisible braces can be a daunting task, especially in a bustling city like New York. Invisible braces, or clear aligners, have become a popular solution for those looking to straighten their teeth without the conspicuous metal braces of old. This guide aims to simplify the selection process by providing clear, actionable advice, real-world examples, and tips to help you make an informed decision. We'll address your pain points and offer practical solutions to ensure you find the perfect invisible braces for your needs.
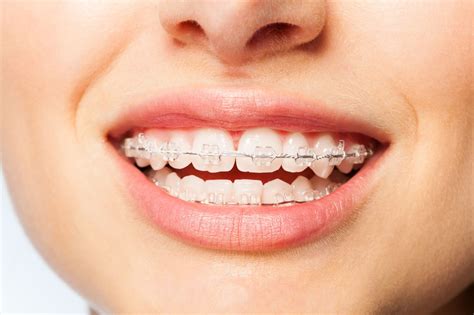
Why Choose Invisible Braces?
Invisible braces offer a myriad of benefits, including improved aesthetics, reduced maintenance, and a higher level of comfort compared to traditional braces. These modern dental devices are crafted to fit snugly over your teeth, gradually shifting them into the desired position. Whether you’re a busy professional or a college student, invisible braces can be a game-changer in your journey toward a confident, straight smile.
Quick Reference
Quick Reference
- Immediate action item: Start your search for an orthodontist who offers invisible braces. A good orthodontist will provide a detailed consultation and a customized treatment plan.
- Essential tip: Consider getting a dental cleaning before your consultation to ensure your teeth are in the best possible condition for treatment.
- Common mistake to avoid: Don’t be rushed into making a decision. Take the time to compare different orthodontists, read reviews, and discuss your goals thoroughly.
How to Choose the Best Invisible Braces Provider in New York
The decision to go for invisible braces involves several steps. Here’s a detailed guide to help you navigate through the process seamlessly.
Step 1: Research Potential Providers
The first step is to research potential providers in your area. Utilize online resources, social media, and word-of-mouth recommendations to identify orthodontists who specialize in invisible braces. Look for professionals with excellent reviews and a proven track record of successful treatments.
Step 2: Schedule Consultations
Once you’ve identified a few potential providers, schedule consultations. This is an opportunity to meet with the orthodontist, discuss your dental goals, and understand the proposed treatment plan. Key points to consider during your consultation include:
- The provider’s experience and qualifications
- The technology and materials they use
- The estimated timeline and cost of the treatment
- Aftercare instructions and expected outcomes
Step 3: Understand the Treatment Process
Each provider will have a slightly different approach, but generally, the process for invisible braces will include:
1. Comprehensive Examination: Your orthodontist will conduct a thorough examination, which may include taking X-rays, photos, and molds of your teeth.
2. Custom Treatment Plan: Based on the examination, your orthodontist will develop a customized treatment plan, outlining the number of aligners you will need and the expected timeline.
3. Fitting and Monitoring: You will receive your aligners and will need to change them periodically according to your provider’s schedule. Regular follow-up appointments will monitor your progress.
Step 4: Evaluate Costs and Insurance
Invisible braces can vary significantly in cost. It’s essential to evaluate the total cost of treatment, including the aligners, any additional fees, and potential discounts. Some providers may offer financing options or accept insurance, which can help make the treatment more affordable.
Step 5: Commit to Aftercare
Aftercare is a crucial part of the invisible braces treatment. Your orthodontist will provide detailed instructions on how to care for your aligners and maintain your oral hygiene. This may include:
- Regularly cleaning and storing your aligners
- Maintaining good oral hygiene to prevent staining and odor
- Attending regular follow-up appointments to monitor progress
Detailed How-To Sections
What to Expect During Your First Consultation
Your first consultation with an orthodontist is a critical step in your journey towards straighter teeth. Here’s what you can expect:
1. Initial Examination: Your orthodontist will examine your teeth and may take digital scans and photographs to create a visual model of your mouth.
2. Discussion of Your Goals: Clearly communicate your expectations and any specific concerns you have about your teeth. The orthodontist will listen carefully and provide honest feedback on what can realistically be achieved.
3. Explanation of Treatment Options: The orthodontist will discuss the available treatment options, including the pros and cons of different types of braces and aligners. They will explain the technology used and how it will work for you.
4. Development of a Treatment Plan: Based on your examination and discussion, a customized treatment plan will be developed, detailing the number of aligners required, the estimated duration of treatment, and any additional procedures that may be needed.
5. Cost and Payment Options: You will receive a detailed breakdown of the costs involved, including any potential additional fees. Payment options and insurance coverage will also be discussed.
This thorough approach ensures that you are fully informed and comfortable with the proposed treatment before moving forward.
The Process of Fitting Your Aligners
Fitting your invisible braces involves several steps to ensure a precise and comfortable fit. Here’s a detailed breakdown:
1. Custom Molding: During your first appointment, impressions of your teeth will be taken to create a custom mold. This mold is used to manufacture your aligners.
2. Initial Fitting: Once your aligners arrive, you will have an initial fitting session where the orthodontist will ensure they fit snugly over your teeth. Any adjustments will be made at this time to ensure comfort and effectiveness.
3. Aligner Sequence: You will receive a sequence of aligners that you will change at regular intervals as instructed by your orthodontist. This gradual progression helps in slowly moving your teeth into the desired position.
4. Wear Instructions: You will be instructed to wear each aligner for the specified period (usually 1-2 weeks per set). Your orthodontist will advise on the total number of sets and the overall timeline for the treatment.
5. Progress Monitoring: Regular follow-up appointments will be scheduled to monitor your progress. Adjustments may be made to the aligner sequence if needed to ensure optimal results.
Maintaining Your Oral Hygiene
Maintaining good oral hygiene is crucial when wearing invisible braces to prevent any complications and ensure the success of your treatment. Here’s how to effectively manage your oral care:
- Regular Cleaning: Remove your aligners before brushing and flossing your teeth. Brush your teeth using a soft-bristled toothbrush and non-abrasive toothpaste for at least two minutes, then floss to remove any trapped food particles.
- Aligner Care: Clean your aligners regularly to prevent staining and odor. Use a gentle, non-abrasive cleaner and a soft toothbrush. Avoid using hot water as it can warp the aligners.
- Storage: Store your aligners in the provided case when not in use to protect them from damage and ensure they fit properly when you need them next.
- Regular Dental Visits: Continue to visit your dentist for regular check-ups and cleanings to ensure your oral health is maintained throughout the treatment.
Practical FAQ
Common user question about practical application
Can I eat with my invisible braces?
It’s best to remove your aligners before eating or drinking anything other than water. Foods that are sticky, hard, or chewy can cause the aligners to become deformed, and this